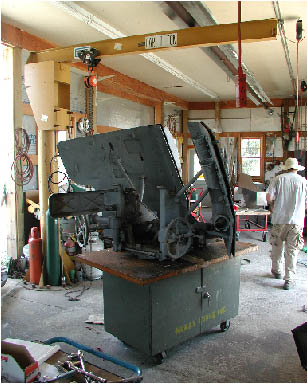
1943 German 88mm PAK 43/41 Anti-Tank Gun
Military Artifact Conservation
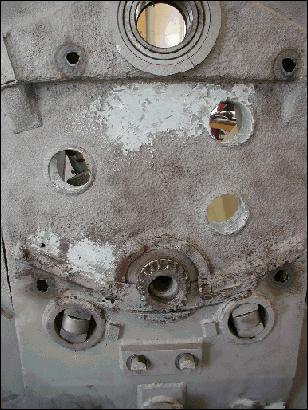
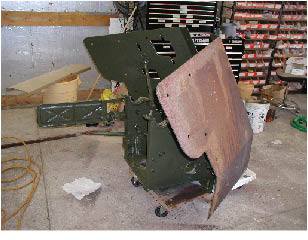
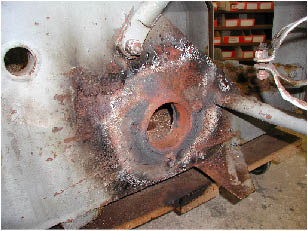
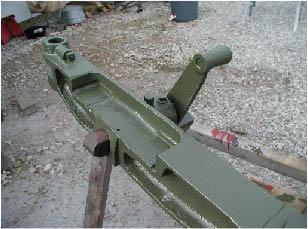
Removal and Condition of the Gun Cradle:
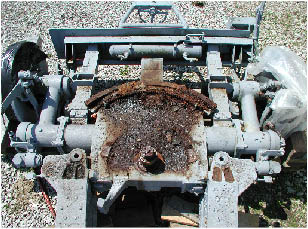
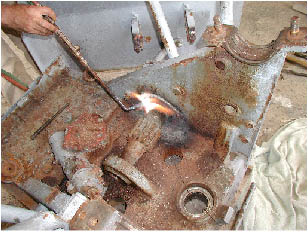
An important part of the work for preservation was to gain access to the area under the cradle and to the top of the carriage where water had pooled for many years causing considerable corrosion.
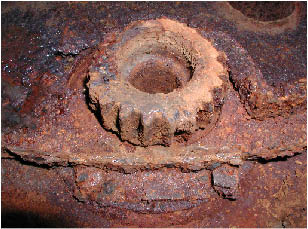
The traverse arc gear was found to be heavily corroded.
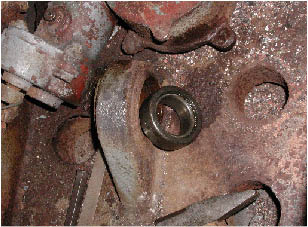
The traverse drive gear seen under the gun cradle in the image below was similarly very corroded. Just below the drive gear and to its left and right are two corroded steel cylinder rollers that bear the forward weight of the cradle but allow traverse movement.
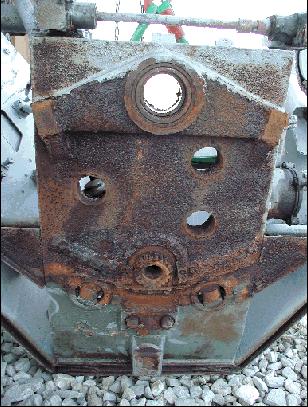
The bottom of the cradle (the sides as well) is constructed as a hollow steel box. Three walled holes provide rigidity to the hollow box at these points.
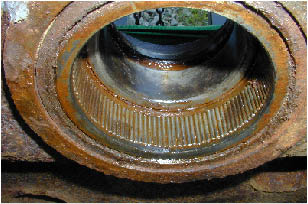

The corrosion of the traverse drive gear under the cradle required that several lost gear teeth be built-up with metal and then ground to proper shape.
The traverse needle bearing in the center photograph had to be replaced with a new bearing.
Similar to the construction of the cradle bottom as a welded steel hollow box, the sides too were hollow with walled round holes for stiffness. Loss of metal seen adjacent to these holes but also in several other areas allowed the rain water to enter and accumulate in the hollow cradle.
Restoration of the Gun Cradle:
After abrasive blast cleaning of the corroded metal gun cradle, all areas of metal lost through corrosion were filled with polyester body putty to prevent future entry of rain water.
The traverse drive gear is seen with restored teeth.
The double shields were separated. There was no evidense of the inner surface ever having been coated. The corrosion here was slight and tight due to rapid shedding of water. In order to present an authentic looking restoration, these inner surfaces were left with their corrosion and left unpainted.
However, to protect the metal from further corrosion, a corrosion inhibiting clear coating was applied. The product used was Ship-2-Shore Industrial, a very effective and long lasting gel that dries to waxy clear film. A Canadian product, it has has an extensive and very successful perfromance history in the maritime industry protecting ship steel from salt water.
Ship-2-Shore products
L.C.C, Box 48205, Victoria, BC, Canada
V8Z 7H6. 800-455-0680. www.lccs.ca.
Ship-2-Shore Industrial and the lower viscosity Ship-2-Shore PLID were used extensively in this restoration. The PLID product was used to penetrate all openings at moving parts and all points of wear to prevent corrosion from water entry when the gun is exhibited outdoors.

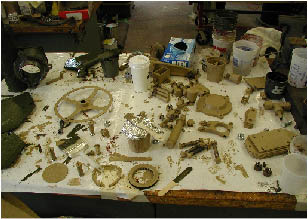
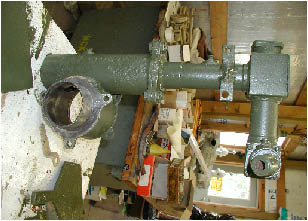
As seen in these images, dis-assembly of the gearing for barrel traverse and elevation was extensive. Individual parts were cleaned to bright metal by blasting with powdered glass, then coated with an industrial 2-part high-build epoxy tinted to match the original red lead primer, then given a second coat of epoxy primer custom matched to Dunkel Gelb, then finally given two coats of PPG Keeler & Long Silicon Alkyd custom matched to Oliv grun.
Restoration of Elevation and Traverse Operation:
Shown is the process of dis-assembly of some of the traverse gearing necessary for the replacement of corroded bearings.
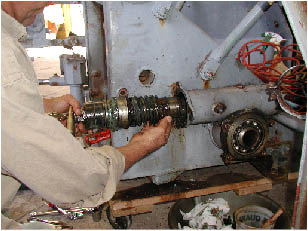
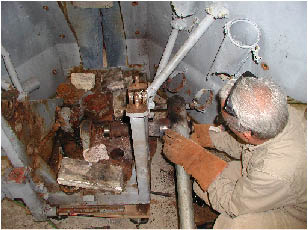
Shown is Thomas Podnar at the work of removing the main drive shaft for the elevation of the barrel. The shaft and its bearing where it penetrates the cradle wall was thoroughly corroded making its removal a very difficult task. The bearing in the pillow block supporting the end of the shaft was damaged by corrosion as well.
Fortunately, modern bearings were available that fit perfectly in all instances.
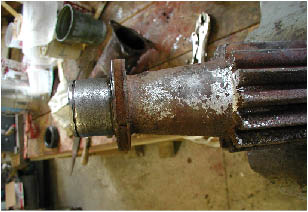
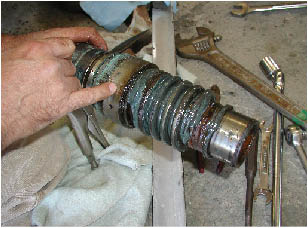
The barrel elevation main drive shaft and gear removed. Note the leather oil seal on the shaft end for the pillow block. This seal was hardened and was replaced with a dense wool felt seal in this restoration.
Restoration of Control Wheels:
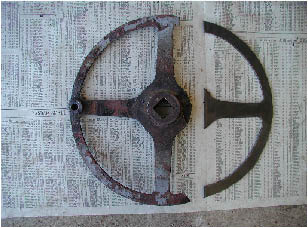
The first image shows the single remaining original wheel handle shaft with its retaining caps.
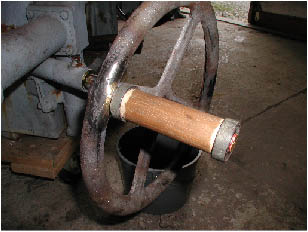
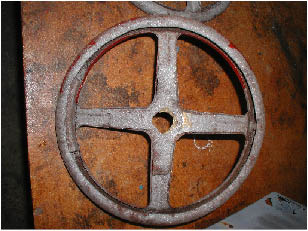
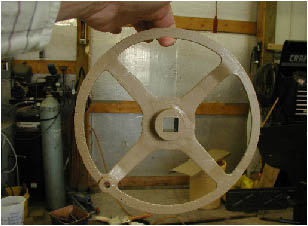
A reproduction matching this original was made for the wheel shown in the middle image.
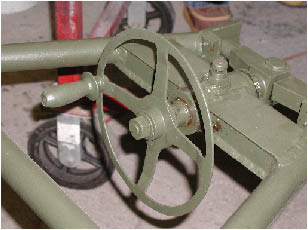
The right image shows the reproduction shaft fitted with a wooden handle on the control wheel that was missing its handle matching those seen in historic drawings and photographs.
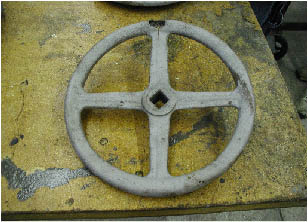
Note the wheel handle counterweight set in the left-hand side of the pressed wheel as shown in the first image. This weight is located on the side opposite the handle. Just one of many attentions to detail found on this gun.
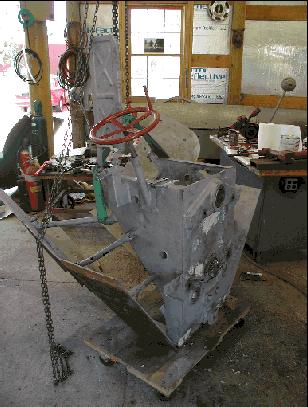
Restored traverse gearing and control wheel with its reproduction handle shaft is shown in the lower photograph.
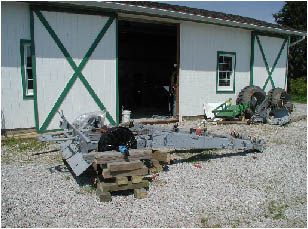
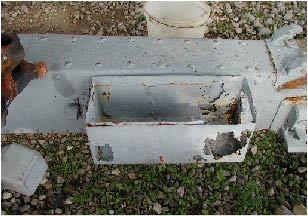
Restoration of Metal Boxes and Tubes:
The steel boxes and tubes on the chassis and on the gun cradle were greatly damaged by loss of metal from corrosion. All were restored to original appearance through the use of inserted steel “false walls” and epoxy and polyester putty.
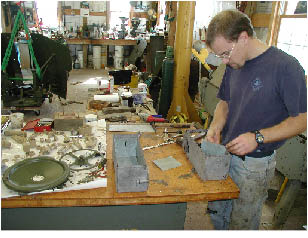
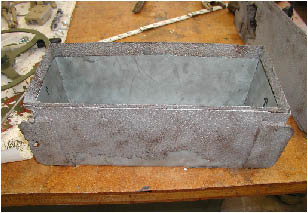
This image shows four “false walls” fit inside the corroded steel box. After finishing the outside surfaces with epoxy and polyester putties, the boxes appeared undamaged.
Below, metals conservator Mark Erdmann is seen fitting a steel “false wall” on the inside of a corroded original box steel wall.
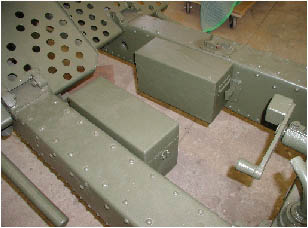
The restored chassis boxes are illustrated below. One lid is a restored original, the other (and its hinge) is a new fabrication to match the original.
The steel tubes on the gun cradle were restored through insertion of curved “false walls” with bottoms and then the exterior surfaces were recreated and smoothed using epoxy and polyester putties. New working lids, hinges and clamping hasps were fabricated for all tubes based on historic images.
Front End and Barrel Locks:
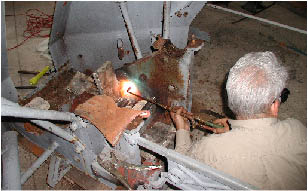
The front end of the chassis had to be removed to reweld a broken original weld.
In the upper image, the chassis front end is seen in our shop for restoration of operability of the front barrel lock.
The middle image shows the restored front barrel lock. A flip-up frame supports a moving bar at its end. This bar can be screwed up by means of a wheel (not shown) to engage slots in a bracket under the front of the barrel when the barrel is centered.
In the image below, the rear barrel lock is shown after restoration of operability. Turning the handle unscrews a pin that fits into a hole in the barrel breech.
Half of the wheel that raises the bar for the front barrel lock was missing. A replacement half was cut from steel and welded into position.
These images show the restored front barrel lock wheel primed with Dunkel Gelb and then finished in Oliv grun.
Restore Torsion Bar Locks:
When the two chassis tails are spread apart for deployment of the gun, a long steel pin on each side is automatically pushed forward by “D” handles (seen in the upper image) and driven into holes (seen in the middle image) that lock the torsion suspension against vertical movement for stability when firing.
These long steel pins were thoroughly corroded in their housings. The image below shows one of them after disassembly and cleaning.
Free-Up Tails for Deployment:
The rear barrel lock is built into a swing-away bar that holds the two tails together. A steel pin locks this bar into position. The locking pin and the bar’s hinge pin were thoroughly corroded and a great effort was required to free them.
The pivot pin of each tail, large steel cylinders, were immovable due to corrosion. Again, it was a difficult task to restore easy movement to these parts.
Free-Up Recoil Spades for Deployment:
The pivot shaft of each recoil spade was immovable from corrosion. Repeated work with heat, chilling and penetrants could not free them.
Eventually, the steel bands holding the eccentric pivot shafts of the recoil spades had to be cut. The cuts can be seen in the top of each band. This allowed some expansion. Then a hole was drilled into each pivot shaft cover to allow penetrant to reach the inside of each eccentric.
After disassembly, cleaning of the shafts and eccentrics, the assembly operated smoothly. The cuts and the holes in the shaft were then welded closed.
Recoating:
All steel was blasted to white metal with powdered and crushed glass according to needs.
The new coatings on the gun follow the original color sequence: red lead primer, Dunkel Gelb, then Oliv Grun. This would allow authentic appearance at areas of wear, revealing the two undercolors.
The sliding breach block, permanently corroded in place and impossible to remove, was left unpainted and was polished to simulate authentic wear. Its bare steel was protected with Ship-2-Shore corrosion control clear coating (see page 20).
Application of the first coat of PPG Keeler & Long Kolorpoxy tinted to match a red lead primer.
Application of a second coat of PPG Keeler & Long Kolorpoxy tinted to match Dunkel gelb.
Application of the first of two coats of PPG Keeler & Long Polysilicone Alkyd flat enamel tinted to match original Oliv Grun found on the gun.
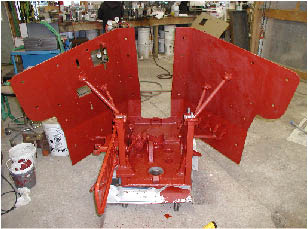
Reassembly after component painting with Oliv Grun.